Showing posts with label Recipe. Show all posts

Monday, March 6, 2017

REVIEW ON BANISH PUMPKIN ENZYME MASQUE


When sometimes smell so good, one should feed it to my skin right?

Now you can with Banish Pumpkin enzyme masque. XD

I was actually very excited to receive this wash off mask inside my package =)  .  I have checking out reviews after reviews and really do wonder about this Banish Pumpkin enzyme masque which is quite a sensation in the beauty world.

As usual, I am skeptical about it and just can't wait to try it out on my face.  If you are not sure about skin type, I have combination sensitive acne prone skin which makes it hard to find skincare products.

Banish Pumpkin enzyme masque


Banish Pumpkin enzyme masque

Banish Pumpkin enzyme masque


Banish Pumpkin enzyme masque
Our Pumpkin Masque may be the greatest thing made out of pumpkins since pumpkin pie. It even smells just as good! If you want to know how to get rid of acne our Pumpkin enzyme masque may be the answer and it's a customer favorite! Why? It contains lots of vitamins and enzymes to help improve your skin's texture and keep your skin looking healthy!

Pumpkin contains natural ingredients that are super beneficial for people who have acne.
What this contains & the benefits: Vitamin A - Great for healing skin!
Dries out acne
Promotes exfoliation of skin
A Vitamin for healthy skin, hair and eyes
Reduce the appearance of oily skin Vitamin C & Beta-Carotene - Antioxidant to protect skin
Reverses skin damage
Defends against skin damage
Reduces fine lines and wrinkles
Improves Skin Elasticity Alpha Hydroxy Acids - The natural exfoliator. These acids can:
Slough off dead skin cells
Brighten skin
Show off your healthy glowing skin underneath
Keeps skin moisturized and takes away flakiness from dry skin.

How to use:
Spread thin layer on face and let dry. Wash off when dried. Usually takes about 10 minutes. If stinging or irritation occurs, rinse off with cool water.
Use 2-3 times a week or as often as needed.


Ingredients: 
Pumpkin Fruit, Organic Bilberry Fruit Extract, Organic Sugar Cane Extract, Organic Orange Peel Extract, Organic Lemon Peel Extract, Glycerin, Tetrasodium ETDA, Vitamin E, Phenoxyethanol, Meadowfoam Seed Oil, Xanthan Gum, Vitamin C, Glycolic Acid, Neem Seed Oil, Rosemary Leaf Extract, Cinnamon Bark Powder, Ginger Root Powder, Nutmeg Powder.

Size: 50ml
*New 50ml bottle to prevent breakage during the shipping process for international orders

Banish Pumpkin enzyme masque


Banish Pumpkin enzyme masque comes in a dark glass jar.  The design and everything else is simple but I think it doesn't matter as long the products work on my skin.

If you like the smell of pumpkin pie, then you will for sure like this =). I am very much in love with the smell of food but of course I know this is to feed my face.  Application is really smooth and easy.  If you have sensitive skin like me, try to control the amount to about the tip of your little finger.  Also remember to patch test because I do feel the 'hot' sensation which can turn into burning if you apply a lot.  Apply about a pea size for one area.
The reason for it because of the cinnamon and nutmeg powder. These two ingredients are good for acne prone skin but it can burn a lot especially if you have highly thin skin.

Also, I would recommend to 1-2 application per week at night instead of 3 times which is more for really oily skin type.  Also do not use other BHA or AHA on the day you use Banish Pumpkin enzyme masque else it can hurt or you will highly over exfoliate and have red skin afterwards. Another is moisturise your skin and don't leave it to dry after washing off the mask.

When I look into the ingredients, there are many ingredients that helps with reducing inflammation, killing acne causing bacteria, moisturise and also exfoliate the skin.  I do like that the first ingredient is their star ingredients and not somewhere low in the list.  Other ingredients such as Bilberry, Sugar Cane, Vitamin C, Rosemary, Ginger and Glycolic acid are some of my favourite ingredients to reduce acne.
However, do check just in case some of the ingredients are not for you.

As for me, I use it twice a week and each time, Banish Pumpkin enzyme masque helps to make my skin smooth XD.  It does help to remove blackheads, shrink the the size of acne and smoother out the texture which is great.  My skin looks better the next day.

Overall, I think Banish Pumpkin enzyme masque is great for people who is looking for an exfoliating mask, couldn't handle other exfoliating products in other forms(serum, toner, essence), combination or oily skin type, acne prone, like natural organic products and cruelty free products.


Product retails for
Banish Pumpkin enzyme masque 50ML, USD35
Made in USA

For more information, please visit Banish Acne Scars official website and Banish Acne Scars Facebook.  Product is sent for my consideration. However, the opinions expressed here are my own and honest as always.

Follow me on my blog and social media sites:


Youtube //  Instagram // Twitter // Pinterest // Bloglovin' // Facebook

Saturday, December 3, 2016

REVIEW ON TEFAL MANUAL CHOPPER

I think most of the time for Asian cooking is spend on cutting onions, garlic and also chilies 😖.  It is really a hassle and sometimes I just wish I can dump the whole big chunk of onions or garlic into the wok. Wok is Asian 5 in 1 cooking utensils. Wiki mentioned it as versatile round bottom cooking vessel.

So, when I received this in my Box of Joy 😍I was so excited to try if this Tefal Manual Chopper could really chop stuff since someone told me that it is useless😟. Don't tell me to use my only blender for meat and for my vegetables because I won't 😅

Here is a review on Tefal Manual Chopper.

Tefal Manual Chopper

Tefal Manual Chopper

Tefal Manual Chopper

Tefal Hand Manual Meat Grinder Mincer Spice Vegetable Chopper Cutter Baby Food Processor Multifunction Kitchen Tool
💓One time pull = 8 circles of knife rotating
💓Designed specially for mixing, blending, chopping, mincing, and more.
💓Time and energy saving. Easy to clean.Simply pull the string to make it work.
💓Food grade material,safe and healthy.


Tefal Manual Chopper

Tefal Manual Chopper
Trying out big chunk of fish meat into the chopper.
Tefal Manual Chopper
Wow, blended into minced meat 😲
Tefal Manual Chopper


Tefal Manual Chopper claims that It chop food items in 5seconds. 😬 Only if you can pull it fast enough in 5 seconds. If you take a break like me, it is going to be more than 5 seconds. I use it actually to make minced meat.  The chopper knife is really sharp so becareful when handling. I do find that the plastic made from good quality and it is easy to scoop out my cooking ingredients from it. Washing it in also easy.

Tefal Manual Chopper really cut down  my cooking time because it can make minced fish meat way more faster than I chop it manually😲. By manual labour with knife, it takes me an hours and I smelt like rotten fish after that.  With Tefal Manual Chopper, I just put the cleaned up fish into the chopper, close the lid and pull the string for about 10 times until it becomes minced meat. The food also taste better with this manual chopper than in blended since it does not heat up.  Blender tend to 'heat' up the food so it doesn't taste as good as chopped with Tefal Manual Chopper.

Also beware of ones that look like this but is not even able to cut onions.  Good Tefal Manual Chopper is even able to chop fish meat into minced one so that is the good quality of product for you. Also it is so good that it doesn't use electricity which is really good for wanting to save up on bills.💓

So, overall I think this is a great products if you are constantly looking for affordable manual chopper that does it job.  Indeed a handy product to have.


Product retails for
Tefal Manual Chopper RM 35.99 HERE

Use the coupon code “20LAPOR25 ” to get 25% off your shopping

For more information, please visit Lazada official website.  Product is sent for my consideration and it is part of Box of Joy   No monetary payment is received.  However, the opinions expressed here are my own and honest as always.


Follow me on my blog and social media sites:


Saturday, May 14, 2016

FOOD: DRAGON DEW CAKE (DESSERT FOR BEAUTY&ANTI-AGEING)

"When there is light, there is also darkness"

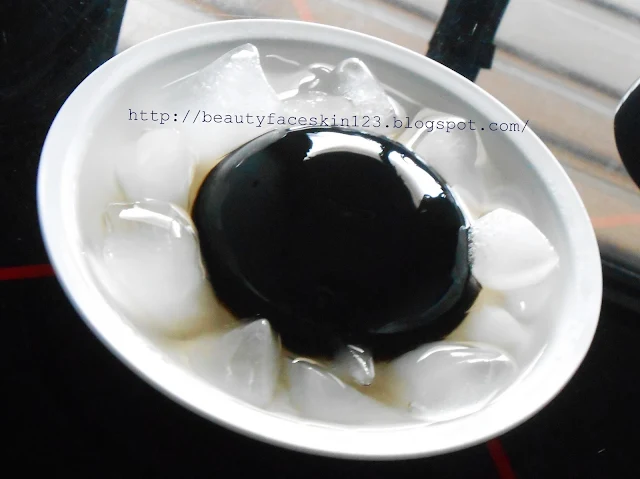
Here is a cake so black that you would think if it comes from the volcanoes.

This is the reverse Asian dessert of the popular 'Raindrop Cake'.
DRAGON DEW CAKE (DESSERT FOR BEAUTY&ANTI-AGEING)


DRAGON DEW CAKE (DESSERT FOR BEAUTY&ANTI-AGEING)
DRAGON DEW CAKE (DESSERT FOR BEAUTY&ANTI-AGEING) 
DRAGON DEW CAKE (DESSERT FOR BEAUTY&ANTI-AGEING)


This is a food recipe for beauty and for health purposes.  I believe that one have to care about what you put inside your body besides caring about what you apply on your face.  Your skin does show the amount of effort you care for yourself.  After all, glowing skin is not just a one night miracle =) .

So, here is the Asian secret for cooling down the 'heat' inside your body and on a hot warm summer.

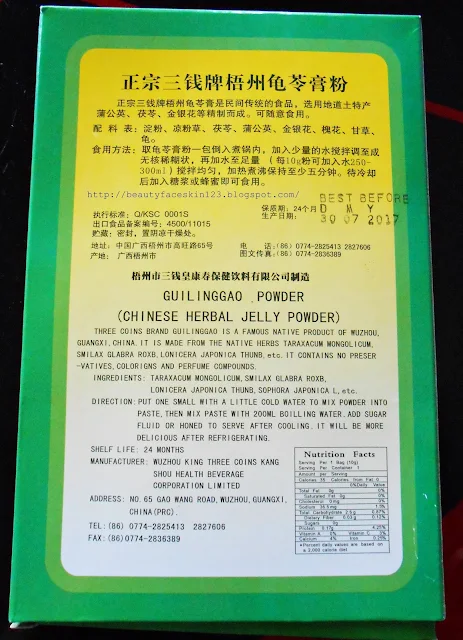
Guilinggao chinese herbal jelly powder
This is the powder I used to make the 'cake'.  There are many imitation out there because it is really famous in Asia and it took me back to a Hong Kong drama that popularize this herbal tea.  It is really good for the health and cool down the body.

Guilinggao chinese herbal jelly powder
It has taraxacum mongolicum (dandelion), smilax glabra roxb (tu fu ling or sarsaparilla ), lonicera japonica (Japanese Honeysuckle) .  No turtles kill in the process.
Guilinggao chinese herbal jelly powder
Guilinggao chinese herbal jelly powder packet

Ingredient:
1 packet of Guilinggao chinese herbal jelly powder (make sure it is original as there are many imitation out there)
250ml of water

Instruction:
1.  Take out two spoon of water from the 250ml water.  Pour in the packet of the herbal powder into the two spoon of water and stir until it is well mix like the glue.  Then, pour the rest of water into the cup and stir again.

2.  Next, boil the mixture just now on the stove.  Use low heat.  Make sure to stir slowly until the mixture turn thicker like glue and then quickly turn off the heat.  (Don't stir until it harden like a lump of jelly)

3.  If you like it sweet, then add in about 20 g sugar into the mixture.  If don't, you can don't have to add in the sugar.  You can serve it with honey later on.

4.  Then pour the mixture into the mold for it to cool down.  Don't use plastic because it is going to be toxic and it is not good for consumption.

5.  Once it cool down, put it inside the fridge and serve it cold.


So, overall do you like it?  It is a fairly easy to make herbal recipe for health and for dessert.  It is actually slightly bitter so children may not like it for sure and we usually eat it with honey or with the plum sweet XP. I am used to the slight bitterness because there are other way bitter things that I have tried before.  It is like eating jelly but with traditional medicinal herbal taste =) .


Products,
Guilinggao chinese herbal jelly powder, you can get the powder from Asian herbal stores.

Food is not sponsored. However, the opinions expressed here are my own and honest as always.


Follow me on my blog and social media sites:

Monday, April 18, 2016

BEAUTY FOOD:SEA CUCUMBER WITH HERBAL SOUP (NON HALAL)

Hi Foodies,

Behold today's menu, something that you will probably see on a friday Horror movie XP. I am just kidding  XP.  I am sharing with you this SEA Cucumber cooked the traditional.way. The look for sea cucumber might just shocked most of you but XP it is one of the beauty food for youthful skin.

It is one of the beauty food recommended to look beautiful and have smooth bouncy skin since sea cucumber contains a lot of collage and it has zero fats in them XP.  Please overlook their hideous looks.

This is one of the recipe used to cook the sea cucumber.  It is actually quite troublesome considering one need to soak and change the water for the sea cucumber and also take few hours to prepare the trotter. It is kind of difficult to cook actually.  Nevertheless, I still need to put this up because I don't know when I will get to eat sea cucumber again considering the price. > <  


SEA CUCUMBER WITH HERBAL SOUP BAK KUT TEH 
If you are wondering where it the sea cucumber, it is the lighter shades long glob far from the vegetables. your lower left of the picture.


SEA CUCUMBER WITH HERBAL SOUP BAK KUT TEH 

SEA CUCUMBER WITH HERBAL SOUP BAK KUT TEH 

SEA CUCUMBER WITH HERBAL SOUP BAK KUT TEH 

SEA CUCUMBER WITH HERBAL SOUP BAK KUT TEH 


Ingredients:

1 pig's trotter (you can use chicken instead)
10 red dates
2 shallot
5 mushroom
2 big sea cucumber (cut it in few pieces)
1 packet of bak kut teh
200ml water
1/4 teaspoon black pepper


Steps;
1. Clean the pig trotter and boiled it with water for 15 minutes.  Take it out and wash it again with water. Remove all the fats.  Do not use back the water to boil the pork just now.
2.  Add in clean water, pork , red dates, mushroom, shallot, black pepper into a clean pot.
3. Boiled for 2 hours.  Then add in sea cucumber and cooked for another 30 minutes.
4. Then add in soya sauce, some vegetables.
5. Serve with rice.

You can use chicken to replace the trotter.

So are you still with me or some of you are already fainted looking into amount of  NSFW ?

The steps might look little and easy considering that I did not mention the amount of time to clean the sea cucumber as well as the time one need to clean the trotter properly.  Make sure to really clean the sea cucumber or it will taste really horrible.


My friend doesn't like sea cucumber because it is tasteless and most people feel like you are eating a blob of tasteless slob. However, beauty enthusiast loves it for the protein and collagen without adding extra pounds onto the body. Well, natural collagen inside the body to get the anti ageing effect which is better than sea cucumber cream?


 No sponsored food here.  However, the opinions expressed here are my own and honest as always.


Follow me on my blog and social media sites:

Saturday, April 2, 2016

TRADITIONAL FOOD LOST IN TIME- CHINESE CASSAVA CAKES / TRADITIONAL CHINESE TAPIOCA CAKES RECIPE


Cassava root is a staple food in many countries. It was the food eaten during the war to replace rice because it was easy to grow. If you have read or watch in many video, cassava is actually poisonous if you don’t know how to prepare it. Now it is no longer consider ‘cheap’ since not many people grow it.


Nowadays, cassava appears inside bubble teas as pearls.

I love the fried tapioca but well it is not really that healthy. Here is a recipe for a healthy traditional Chinese tapioca cakes.


TRADITIONAL CHINESE CASSAVA CAKES / TRADITIONAL CHINESE TAPIOCA CAKES RECIPE

TRADITIONAL CHINESE CASSAVA CAKES / TRADITIONAL CHINESE TAPIOCA CAKES RECIPE

Ingredients:

300g Tapioca /cassava

fried dried shrimps
cooked shallots
Chillies removed the seed
Pinch of salt
pinch of sugar
pepper
green onions
200ml water (or just enough to make sure it is not too soft)
100g flour


Steps:

1.  Grind the cassava with a grinder.  You can also smash it but it won't taste that good. Pour the extra water away.

2.  Add in all the other ingredients.

3.  Pour it into the pan.

4.  Steam it for about 20minutes.

5.  When it is cold, you can fried it if you like to make it more firm and crispy.


Enjoy them. It is nice to serve for tea =) .  This is a traditional Chinese cakes and only people during the olden days eat it.  I think this has now become extinct.  I don't see this anymore.  Besides, the younger generation doesn't like these kind of cakes anymore.  Ermm... I am not that old if it gives any impression that I sound ancient. XP


Tips: Do not reuse the water that you use to wash the cassava as they are poisonous.


The opinions and food recipe expressed here is my own and honest as always.

Follow me on my blog and social media sites:


Wednesday, December 2, 2015

BANANA CAKE RECIPE

Hi foodies,

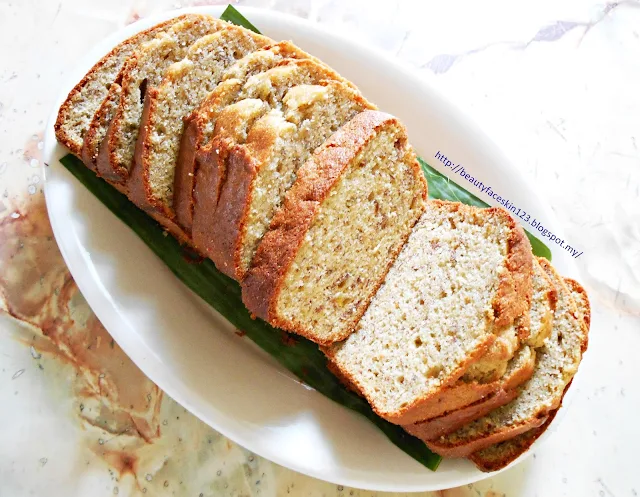
Since some readers ask for some dessert, here is an easy banana cake.  It is actually nice to eat this with some ice cream with tea.


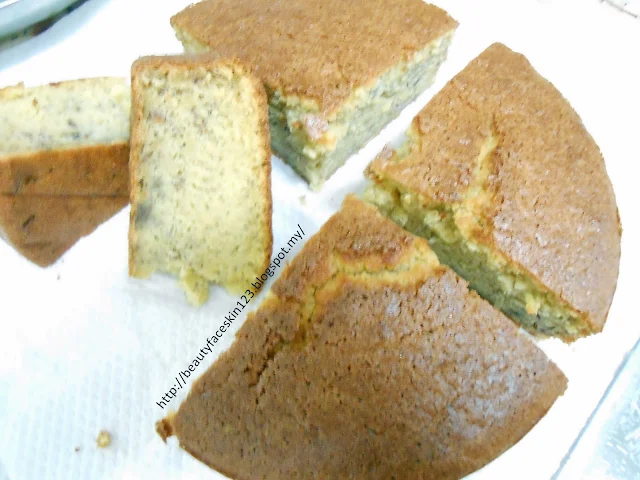
BANANA CAKE RECIPE
BANANA CAKE RECIPE

BANANA CAKE RECIPE
BANANA CAKE RECIPE

BANANA CAKE
BANANA CAKE

BANANA CAKE RECIPE
BANANA CAKE

BANANA CAKE RECIPE
BANANA CAKE


Ingredients:

300g banana
1 teaspoon soda bicarbonate
140g sugar
5 eggs (medium size)
240g self raising flour
1/2 tea spoon salt
60ml vegetables oil (olive oil, palm oil)

Steps:
1. Smash the banana. add in soda bicarbonate. Leave it for 30 minutes.
2. Whisk the egg and sugar until it is frothy.
3. Add in the self raising flour add in the salt. Mix until it is smooth.  Add in the banana mixture and mix it. Leave it for 30 minutes.
4. Add in the vegetables oil and mix until it is smooth.
5. Grease the mould and pour the batter into a mould 8X 4 X 3 inches.
6. Heat the oven 180 degree for 10 minutes. (depending on your oven-use medium heat)
7. Bake inside the oven at 180degree celcius for 35minutes. (depending on your oven-use medium heat)
8.  Serve it with ice cream and tea.


I will try to come up with some other dessert.  Actually, Chinese dessert are all the warm ones but there are some cold Malaysian dessert but I actually am lousy at cooking dessert.  Another reason that I don't have much cooking recipe now because I forgot to take photos and ate them up already.  This is the problem if being a glutton.  It is so hard to suppress my appetite and take photos of the food.


Not paid.  The opinions expressed here are my own and honest as always.

Follow me on my blog and social media sites:

Friday, September 25, 2015

SEAWEED NOODLES RECIPE


Dear readers,


Sorry that I didn’t have any food review or recipe this month because I was busy, sick and too stress up to be able to cook. Someone told me that she likes to read my food post and so here is one.

A simple recipe where anyone can cook.


I do this when I am busy and just want something with soup and after all seaweed is good for the body. Just don’t eat too much of it. > < Everything in moderation.


This is simply Chinese way of cooking so I am not sure about other Asian cooking. Nevertheless, it is easy =) .


SEAWEED NOODLES RECIPE

SEAWEED NOODLES RECIPE


Ingredients:

15g anchovies

600ml water

1 stalk of celery (up to your liking)

Slices of carrot

1g of seaweed

Fishballs

I packet of noodles(You can use different type of noodles )


1. Boil the water along with the anchovies and carrot for about 15minutes.

2. Then put in all the vegetables and boil in for another 5minutes.

3. Put in the noodles and boil until it is soft.


Try this simple recipe yourself =). It is not that difficult.

Thank you for reading.


No sponsored. The opinions expressed here are my own and honest as always.

Sunday, August 9, 2015

BEAUTY JUICE: COOLING JUICE FOR HOT SUMMER

If you are into natural way of taking care of you skin, then you have probably heard of traditional medicine that talks about the balance of ying and yang.  This applies even to the skin health.  If you are 'overheated' with food such as red meat and fried food, then it is recommended to drink or eat vegetables to balance the 'qi' out.

If you still do not do anything about it, then you are probably going to have sudden flare up of skin issues such as acne or pimples.

Personally, I hate eating cucumber because I can never like the smell not matter how hard I tried.  I know there are so much benefits from eating cucumber but well I just 'hate it'.  So, I will just make juice out of it.

This is a vegetables juice to cool down your body especially on hot day or in a summer.


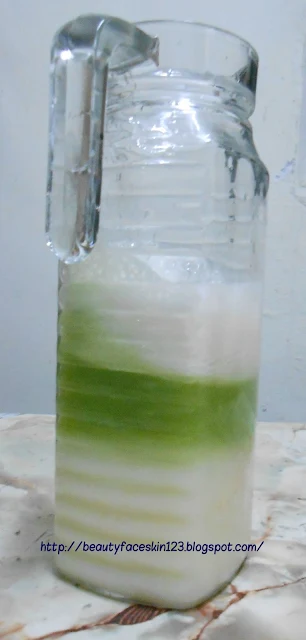
BEAUTY JUICE: COOLING JUICE ,CUCUMBER AND CHINESE TURNIP
Add caption
Ingredients (for 2 person)
1 big Jicama turnip(chinese turnip) (peeled the skin and cut)
1 Cucumber (I used the Japanese cucumber because it is sweet and not bitter) (I just washed the skin and cut it in half)


The reason that you can get such beautiful colour is I pressed the juice from the chinese turnip first. Then followed by the cucumber. Lastly, top it up with chinese turnip.  After you mix it, it will be light green.  The juice will look cool XP.

If you like cucumber, then you will enjoy the smell and the taste.  It is lightly sweet so it doesn't taste bad.  In fact, it is actually nice.  There is no need to add in any sugar or whatever sweetener.

The only thing is it has strong fresh cucumber smell.  It is just in my genes (I am the only one in my family that hates it).

Please don't tell me to keep forcing myself to eat cucumber everyday T_T  .  I had been doing it for the past 10 years but still hate it.  I wonder when my taste buds are going to change for the better and be in love with cucumber? XD


BEAUTY JUICE: COOLING JUICE ,CUCUMBER AND CHINESE TURNIP


Beautiful colour right?

Another tips for drinking juice.   Drink the juice one to two hours before bed.  There is no need to eat heavy supper.  However, do drink a cup of vegetables or fruit juice which can assist your stomach and help your body.

*word of advice-do not give this juice to your children at night or they will either pee in the bed or run to the toilet in the middle of the night.

I have no time in the morning because I always in rush or am way to lazy.  Moreover, I prefer coffee or tea in the morning.  So fruit juice and vegetables juice is for my supper. XP


Not a sponsored post. The opinions expressed here are my own and honest as always.


Follow me on my blog and social media sites:


Pastel Noodles: Click to shop (use "Welcome" for 10% discount)

ZALORA: Get 15% off storewide with no minimum spend with the code ZBAPQW6J

Saturday, July 25, 2015

CHEE CHEONG FUN RECIPE/ STEAMED RICE NOODLES/ HONG KONG STYLE CHEE CHEONG FUN


I guess many knew about that famous leaning tower of Teluk Intan, Malaysia and "the must eat" food when you are in Teluk Intan. Today, I am sharing the similar food recipe of this famous Chee cheong fun or the direct translation will be the ‘intestine’.


There are actually few shops that selling the same thing but they amount of ingredients and price are different. Tourist will usually patronise the famous Liew Kee Chee Cheong Fun shop in Jalan Hill the road which only has takeaway.  The locals will go to San Siew Yeah Chee Cheong Fun further away from the town, Jalan Sultan Abdullah. which only opens at night.


The chee cheong fun in Teluk Intan is actually different because we eat it with green pickles chillies and the ingredients is mixed up inside the noodles itself. However, many who are used to plain chee cheong fun will not find it interesting or tasty.

CHEE CHEONG FUN RECIPE/ STEAMED RICE NOODLES


Anyway, here my mum’s homemade chee cheong fun. We don’t know what is inside the real chee cheong fun as those are secret recipe that they won't tell anyone.  Here we put in anything we like. XP


Ingredients:

A: Flour
150 g rice flour
25g tapioca flour
25 g corn flour
50 g flour
a pinch of salt
25g oil
600ml boiled water

B: The toppings: (you can modified it to your liking)
3 spring onions cut
soya sauce
dice pork meat / dice meat
50g fried shrimps
80g Jicama turnip(chinese turnip) julienne turnip
30g preserved turnip/ chai po
2 cloves of garlic
a pinch of salt
small spoon of dark black soya cause
 a pinch pepper

Steps:
1.Mix everything of the A:flour together well.  Set aside.
2.  The mix up everything of B and stir them in the wok or pan until it is cook.
3.  Boiled the water in a steamer.
4.  Oil the pan and put inside the pan to heat it up first.
5.  Pour a thin sliced of mixture of A:Flour. Make sure it is even.
6.  Sprinkle the B:toppings on top.
7.  Steam it for 8 minutes.
8. Remove the chee cheong fun when it is still warm or else it will stick to the pan. Served with green chillies and soya sauces.


 Do try it and see if you like it.


The opinions and food recipe expressed here is my own and honest as always.

Follow me on my blog and social media sites:


Pastel Noodles: Click to shop (use "Welcome" for 10% discount)

ZALORA: Get 15% off storewide with no minimum spend with the code ZBAPQW6J

Monday, April 13, 2015

FOOD: SKEWERED MEAT ( SATAY RECIPE)


Hi foodies,

It has been some time since I share or write about food. With the spike of price for almost everything (not for salary), I tried to lessen my activities outside now. Have to cut amount of shopping too.  Many are eating at home and bring food to workplace.


Today, just sharing a local Asian food that is popular in my country. It is called Satay which I have no idea where the words came from. It is basically a skewered meat. You can use more chilies if you like it to be spicy and different kind of meat. The one here is not spicy at all. Chicken meat tastes the best. You can also use beef but it will be hard which I don't really like.

SKEWERED MEAT ( SATAY RECIPE)
satay and sata sauce


SKEWERED MEAT ( SATAY RECIPE)
Satay


SKEWERED MEAT ( SATAY RECIPE)
satay sauce


Here are the ingredients:

A.The sauce:
5 shallots
1 big onions
1 bulb of garlic
6 bulb of lemongrass
4 dry chillies 
4 red chillies
1 pieces of turmeric1 pieces of galangal
1 tablespoon spoon coriander seeds
1 tablespoon Tamarind diluted with 1bowl of water
200ml coconut milk
A pinch of salt
70g sugar
125ml of vegetable oil
100g grounded groundnuts or coarse groundnuts


B. The meat:
500g meat
1 tablespoon turmeric powder
2 tablespoons of soya sauce
1 tablespoon sugar
3 tablespoons sesame oil
Skewered stick


C. Side dishes

1 cucumber cut into slices


Instructions:

Sauce:
1. Blend shallots, onions, garlic, lemongrass, dry chillies 4 red chillies, turmeric, galangal, coriander seeds, salt, sugar. Cooked under low fire with the 150g oil until well blended.

2. Then add in the Tamarind and stir it. Cook under low fire

3. After that, add in the coconut milk. Cook until the colour turn golden or fragrant.

4. Take it out and add in the grounded groundnuts . You can use coarse groundnut if you want the crunchy feeling to it.


Meat:

1.  Just add in turmeric powder, soya sauce, sugar,sesame oil into the meat and just mix.

2.  Leave it for about 15 minutes. Then, skewered the meat.

3. Grilled it until it is fully cooked.

4.  You can also use the oven. Just wrap it with aluminum foil to prevent the meat turning too hard.

5.  Serve with cucumber.


I hope that you will like it.


No reviews here.  The opinions expressed here are my own and honest as always.

Follow me on my blog and social media sites:


Pastel Noodles: Click to shop
HiShop: Click to shop
ZALORA: Get 15% off storewide with no minimum spend with the code ZBAPQW6J

Saturday, February 28, 2015

FOOD:HOTTEOK RECIPE (KOREAN PANCAKE)

My dear readers,

Just made this Korean pancake for breakfast because I am bore with the usual pancake I have.

This is a Korean pancake.  You can change the filling according to your preference.
I just change a little by adding the sausages on top of the pancake for fun. I like adding a little meat. *hahahaha*


Korean Hotteok has sweet fillings such as brown sugar or honey and is eaten during winter.  It is one of the street food but well you can always make it at home yourself =) .  It is actually easy and not difficult at all.
FOOD:HOTTEOK RECIPE (KOREAN PANCAKE)

Dough:
1 cups of wheat flour
1/2 cup water
milk (you can add a little milk powder if you are not allergic to it)
1tbs sugar
1 tbs yeast
1.  Mix the water, milk (you can add a little milk powder if you are not allergic to it), sugar, yeast together.  Stir well.
2,  Add in the wheat flour or you can use all purpose flour and mix it.
3.  Let it seat for about 1/2 hour and then knead it a little.
4. Leave for another 10 minutes.


Fillings:
two leaves of cabbages cut into strips
1/2 carrots strips
2 stick of sausages cut into the circles shape

You can create your own fillings.  I am health conscious so the traditional fillings as brown sugar or cheese is too high in calories for me so I decided to just use vegetables.

1. Mix all the vegetables together.  You can either mix the sausages together or leave it aside.


Make the Hotteok:
1.  Just knead the dough together again and then make it into 4 balls.
2. Then just take the ball and put the fillings in the centre. Then knead it into a ball.
Okay, here I cheated because I am lousy in kneading it into a ball so I actually separate the balls into two. Then put the fillings in between the two dough and sealed the side. *embarrassed*
3.  Then heat the pan and cooked the hotteok.  Press on the hotteok and turn to another side when the bottom become golden brown.
4.  Serve it hot.


I think it is good for tea or for breakfast.  Try it yourself at home.

Food is not sponsored.  The opinions expressed here are my own and honest as always.

Follow me on my blog and social media sites:


Pastel Noodles: Click to shop
HiShop: Click to shop
ZALORA: Get 15% off storewide with no minimum spend with the code ZBAPQW6J

Thursday, February 19, 2015

FOOD: CHINESE NEW YEAR TRADITIONAL NIAN GAO

Hi beauties,


I know Chinese New Year is very near and even my family is making preparation to celebrate it and this involved making a lot of cookies and food.  One thing I always look forwards during New Year is food because I get to eat many kind of traditional food.  One of it this Nian Gao. It means New Year cakes.

This is sure a heavenly made New Year cake that I only get to see once a year making the suffering long wait really worth it.


FOOD: CHINESE NEW YEAR TRADITIONAL NIAN GAO
Nian Gao

It is called Nian Gao in Mandarin, Kuih Bakul in Malay, Ti Kueh in Hokkien.  I don't know what it is called in Cantonese.


FOOD: CHINESE NEW YEAR TRADITIONAL NIAN GAO
Nian Gao


The real traditional one has the banana leaves wrapped around it.  I don't like the plastic one because it taste far away from the real Nian Gao.  It is already hard to find now knowing the effort and time to make it is really long.

The ingredients are simple and it is actually white in colour before cooking.  So, if it doesn't turn red brown, then you have failed in making the Nian Gao.  It is not an auspicious sign if that happens and the reason why many prefer to leave it to the expert.  A real Nian Gao can last months without changes in taste or cause food poisoning.  I personally have eaten one which was already one year and it tasted so GOOOOD.  It taste really good sandwich in between yam and sweet potatoes.  The melting of the caramel Nian Gao can rival some chocolate lava cake or praline chocolates.  The taste is just superb provided one know how to cook it right.  Done wrongly, you will lumps of inedible burnt Nian Gao which is such a waste.

The Nian Gao comes from an incident done during a war.  The family made a wall full of Nian Gao bricks.  Since it is a wall, no one would think that it is something edible.  Years passed and family were run out of food supplies since there was a war.  One of the family members  suggested that they eat the 'brick'.  They cut away the outer layer of the bricks and just steamed them.  No one dares to eat it at first but once they ate it , the taste was so good that they decided to share it with the neighbours.  The name came because it was New Year and they have that as their food.

Now, it has become a traditional food for the Chinese community and eaten during New Year.  I love it very much. Did I say how much I love it again?

So yummy that I wonder why I have to suffer so long and yet only get to eat a few each year?  Too many Dinosaurs at home and I eat slower than all those Dinosaurs


Do love Nian Gao or do you have traditional food that you like too?


Food is not sponsored. The opinions expressed here are my own and honest as always.
Follow me on my blog and social media sites:


Pastel Noodles: Click to shop
HiShop: Click to shop
ZALORA: Get 15% off storewide with no minimum spend with the code ZBAPQW6J

Monday, February 16, 2015

FOOD:CHINESE NEW YEAR PEANUT COOKIES RECIPE

Hi beauties!

Just want to share with you what I bake for Chinese New Year and before chinese new year, it has already goes down into my stomach.

Peanut cookies are one of my favourites cookies but too bad I can't eat them too much or my skin has to suffer the consequences later.  For those having acne prone skin, better avoid eating too much peanuts.  It is actually cheaper if you make it yourselves and generally it is cheaper than you buy outside.

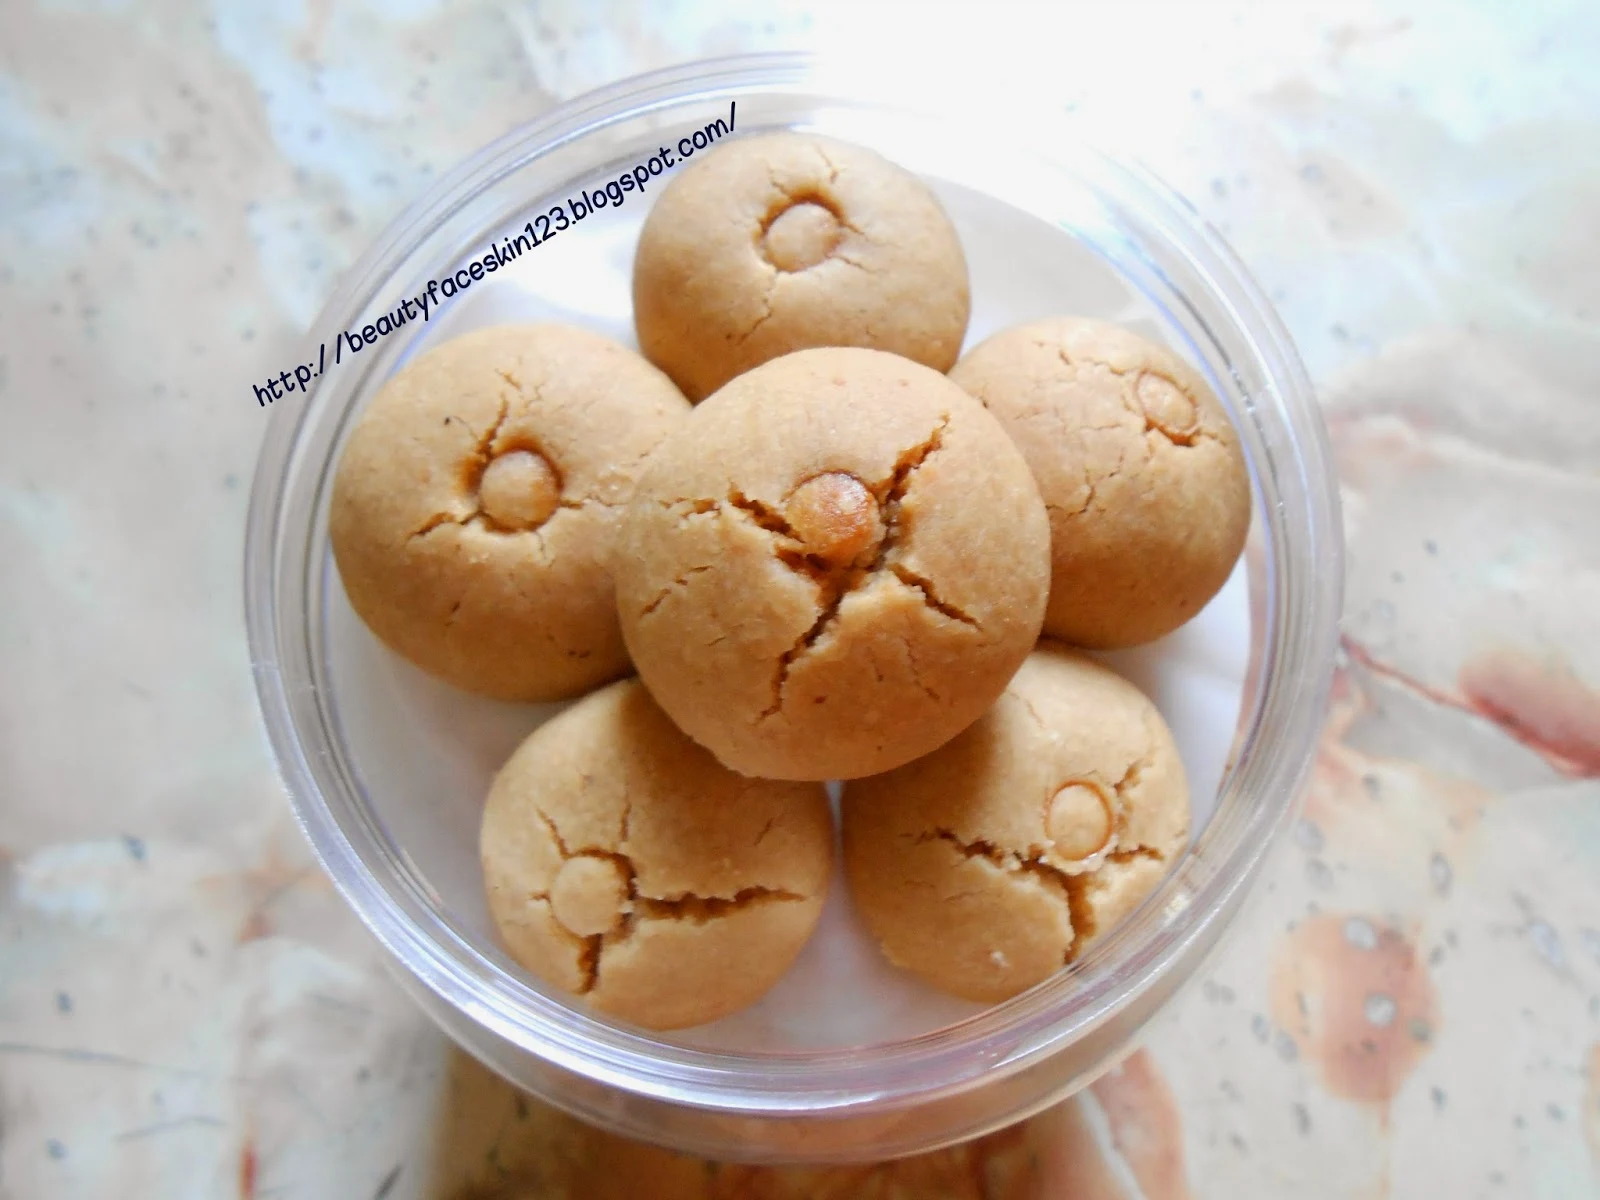
FOOD:CHINESE NEW YEAR PEANUT COOKIES RECIPE

FOOD:CHINESE NEW YEAR PEANUT COOKIES RECIPE

So here is the cookies.  Does it look delicious? I used the straw to make the pattern.

Here is the recipe:

Ingredients:
200g blended peanuts
150g icing sugar
150g vegetables oil
200g flour (Blue key brand if your are in Malaysia)
a pinch of salt


Steps:
1. Pour all the blended peanuts, sugar, oil and flour into a bowl and just mix together.
2. Then just mold it into a round shape.
3. Glaze with with egg yolk for a nicer colour.  I don't use it because am afraid I will burnt it.
3. Put in the oven and cooked it at 180 celcius for 15minutes.


*I am using a medium Khind toaster oven so if you may need to change the temperature and time according to your oven.


So it is really easy to make it right?  Why not try it yourselves at home?


Food is not sponsored. The opinions expressed here are my own and honest as always.

Follow me on my blog and social media sites:


Pastel Noodles: Click to shop
HiShop: Click to shop
ZALORA: Get 15% off storewide with no minimum spend with the code ZBAPQW6J

Have a great day =)