Showing posts with label Nails. Show all posts

Monday, July 26, 2021

REVIEW ON OOMYNAILS PRESS ON NAILS

Hi beautiful,

Press on nails makes life so easy without sitting for three hours and paying hundreds for pretty beautiful nails.  It takes only a few minutes with easy application and professional looking manicure.

Here is the review on OOMYNAILS  NAILS PRESS ON NAILS.
The one I have here is the 3D nails I Do.


OOMYNAILS  NAILS
OOMYNAILS  NAILS


OOMYNAILS  NAILS PRESS ON NAILS
OOMYNAILS  NAILS PRESS ON NAILS

OOMYNAILS  NAILS
OOMYNAILS  NAILS

OOMYNAILS  NAILS PRESS ON NAILS
OOMYNAILS  NAILS PRESS ON NAILS

OOMYNAILS NAILS

OOMYNAILS NAILS 48 Adhesive Tabs
48 Adhesive Tabs

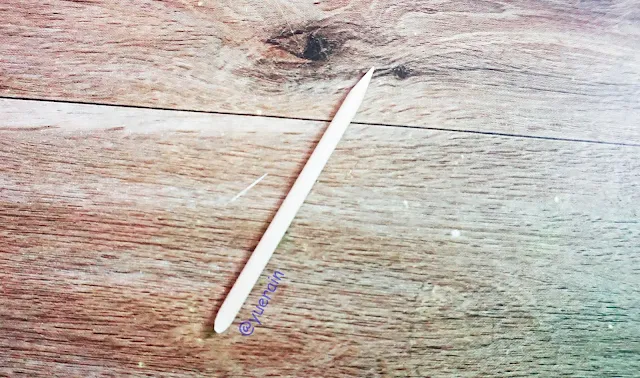
OOMYNAILS NAILS Manicure Stick
Manicure Stick

OOMYNAILS NAILS Mini Nail File
Mini Nail File

OOMYNAILS NAILS 24 Nails
OOMYNAILS NAILS 3D IN I DO

OOMYNAILS  NAILS PRESS ON NAILS
OOMYNAILS  NAILS PRESS ON NAILS


OOMYNAILS has 300 styles for every occasions- parties, daily, weddings, dates
There are also many shapes&lengths
So many designs-French tips, Matte, glossy,3D Art, Graffiti, flame patterns, cat eyes, etc

Few minutes and with easy fabulous manicures.


HOW TO APPLY:
Step1: Gently push the edges of the nails with the Manicure Stick to remove excess cutin. 
           Then use a Prep pad to remove moisture and oil from the surface of the nails.
Step2: Choose the right nail size.
Step3: Paste the adhesive to the inside of the nail piece, remove the protective film.
Step4: Fit the nail piece and press for 15 seconds (Do not contact with water in 2 hours after finishing).
Step5: File the nail if necessary.

To remove it:
Peel off nails gently from the sides using the manicure stick. (Do not force or pull nails off. If needed, soak hands in warm water or apply polish remover around edges, then use the mani stick to gently lift off nails.)


Flexible and lightweight for comfortable wear
Easy to apply and remove
Multiple Wears
Waterproof

Packaging:   There are 24 Nails, Mini Nail File, Manicure Stick, 48 Adhesive Tabs, Prep Pad.  It has everything needed for a manicure.  Easy simple packaging that you can see the designs as well.  It is good that there is instruction at the back of the packaging and everything is package in a nice easy to carry box. 

Review:  The one here I have is just so pretty.  The butterfly on the nail is strong and lightweight.    It is also easy to take out the adhesive tabs and place on the fingers.  It is waterproof and the glue does last for a week before I remove it.  It takes out the trouble of trying to apply nail polish using my non dominant shaky hand.

Overall: Easy press on nails at home, beautiful and is very affordable.


OOMYNAILS Official social media link
Website: https://oomynails.com/
Facebook: OomynailsOfficial
Instagram: @oomynailsofficial


Product retails for 
OOMYNAILS 3D IN "I DO"  Direct Link HERE

Here are some other beautiful nails design:

For more information , please visit official OOMYNAILS website. Product is sent for my consideration. However, the opinions expressed here are my own and honest as always.


Follow me on my blog and social media sites:
Youtube //  Instagram // Twitter // Bloglovin' // Facebook


Friday, June 30, 2017

KOREAN DIAMOND NAILS ART DESIGN TUTORIAL INSPIRED BY UNISTELLA

Hi,
Diamond nails is one of the popular Korean nail trend in 2017. Besides, diamond is women best friend right? 👯🃁
simple Korean diamond nails art design inspired by Unistella
Korean diamond nails art design inspired by Unistella
simple Korean diamond nails art design inspired by Unistella
Korean diamond nails art design inspired by Unistella

simple Korean diamond nails art design inspired by Unistella
Korean diamond nails art design


So here is a simple Korean diamond nails art design inspired by Unistella which you could try it yourself at home. If you like shattered nails which uses holographic papers, this diamond nail is an extension of it.

It doesn't last that long compare to normal nails.  However, getting it done at the salon by professional can be costly although it is really pretty to look at.  Get a good adhesive for nail to use with this diamond nails for the effect to last longer.

You do not have to use the exact same thing as I use since something similar will do.

Things needed:
-Nail polish in silver. (OPI in silver canvas)
-filler base (Withshyan filler base coat)
-holographic silver paper
-nail adhesive or nail glue
-toothpick, ruby pusher or tweezers

simple Korean diamond nails art design inspired by Unistella
Korean diamond nails art design inspired by Unistella


Tutorial on a simple Korean design, Diamond nail art.
1. Cut the holographic silver paper into shards.
2. Apply base coat.Wait for it to dry.
3. Apply silver nail polish. It doesn't have to be nice.
4. Pick the cut shard using tweezers or toothpick.  Apply some glue.
5. Apply it on the nails. Do not leave any space between the shards.
6. Use a nail clipper or nail scissors to make the nail neater.
7. Done.


So here is a simple easy diamond nails that you can do at home. I don't use any top coat as it distort the holographic paper and make the colour really dull and looks bad. If you use gel nail for top coat, it will last longer.  You could also use a really good nail glue to stick the holographic paper onto the nail for more longer wear.  You could do variation with using different colour of holographic paper for fruit diamond designs which are pretty too.  For examples various with pineapple and watermelon design.

I hope that you like this simple easy to do diamond nails design.


Not sponsored. However, the opinions expressed here are my own and honest as always.


Follow me on my blog and social media sites:

Youtube //  Instagram // Twitter // Pinterest // Bloglovin' // Facebook

Thursday, June 15, 2017

[ALTHEA X WITHSHYAN] SUMMER NEGATIVE SPACE FRUIT NAIL ART DESIGN

Hi nail art lovers,

I was excited to receive the Withshyan Nail It Box which is really great for summer nail art design.  I think it would be a great to create a simple DIY on negative space combined with fruit design for a minimalist design that is in trend for 2017.

So, here is the Summer negative space fruit nail art design using products from Withshyan .

Summer negative space fruit nail art design using product from Withshyan
Summer negative space fruit nail art design
Summer negative fruit nail art design using product from Withshyan
Summer negative space fruit nail art design


withshyan nail box
withshyan nail polishes-green latte, honeymoon(red), green leaf, nail base coat, uv nail top coat, peel off


Summer negative space fruit nail art design using withshyan
withshyan nail remover

Summer negative space fruit nail art design using product from Withshyan
Summer negative space fruit nail art design using product from Withshyan 


Summer fruit nail design-negative space fruit nail artusing product from Withshyan
Summer fruit nail design-negative space fruit nail art
Pineapple (thumb), grapes (pinky), pear(ring finger), durian(middle finger) and watermelon (index finger). I wonder which one you like?
Summer fruit nail design-negative space fruit nail art


Things needed:
withshyan Nail polishes in :
-Honeymoon is a bright red color with fine black glitters.
-Green Latte is a yellowish light green.
-Green Leaf is a dark green.

-filler base
-UV gel nail top coat
-peel off
-nail polish remover
-toothpick or tiny watercolour brush or bobby pin(optional)
-ruby pusher or tweezer (optional)


Tutorial on a simple Korean design, negative space Watermelon nail art.
1. Apply base coat.
2. Apply the peel off around the nail, and on half of the nail. Be generous with the amount and be careful because this is very important for the outcome of the nail.
3. Apply two coat of Green latte(light green) over the inner part of the nail. Let it dry.
4. Apply the peel off with a very thin line near the cuticle. Do leave a thin space before the cuticle. make sure to apply a few layer on top of each other and be careful during application.
If you do not have peel off, you can cut scotch tape or reinforcement ring.
5. Apply Green leaf(dark green) near the cuticle.
6. Apply Honeymoon(red) after the peel off.
7. Wait for both to dry properly.
8.Peel off carefully.
9. Apply top coat to make it look like gel nail.


So, that is the tutorial on a simple negative space watermelon nail art. You can change the green latter to Green leaf (dark green) if two layers of watermelon skin is difficult.  I don't use gel nail polishes since I don't UV nail polishes or the UV lamp so using the normal nail polishes can also product beautiful effect too.

You don't have to use the same brand of nail polishes as I do. Since I received the box for review and it has so many colours that I want to use, I just thought that it would be good idea to share a Korean nail art using Korean nail polishes.

Do you like the watermelon nail art design? Do you like the other fruit design too?  If interested, let me know so that I can come up with a tutorial for it.


Product retails for
Althea X With Shyan Nail It Box  at RM93 (original price at RM448) on Althea Korea
Made in Korea.


RM20 off for your first order, and I'll get RM20 HERE

For more information, please visit Althea official websiteAlthea InstagramAlthea Facebook and With Shyan website.  Product is courtesy of Butterfly project . However, the opinions expressed here are my own and honest as always.


Follow me on my blog and social media sites:


Youtube //  Instagram // Twitter // Pinterest // Bloglovin' // Facebook

Saturday, June 10, 2017

UNBOXING ALTHEA X WITHSHYAN NAIL IT BOX

Hi,

To Kbeauty nail trend lovers, I am sure you would like to try some of their nail products too without breaking your bank.  I really love their nail arts which is really unique and pretty.

So, when I saw that Althea was looking for people to review WithShyan Nail It Box and got selected, I was really aesthetic because this is my first time trying out Korean nail products.

Besides, this limited  WithShyan Nail It Box is just such a great value nails value box.  The individual product combined in this box cost RM448.  This box is only cost RM93 which is 79% discounted which is really awesome.  Althea has limited edition box that has great discounts and always sold out fast so get yours while you can.

So here is an unboxing of Althea X Withshyan Nail It Box.

withshyan is a Korean brand that made lots of affordable nail products. Their products are not just limited to classic nail polish. They do have gel nail polishes, stickers, glitter, stones and nail care. Basically everything you will need for a professional at home nail art effect.


Althea X Withshyan nail it box
Althea X Withshyan Nail it Box

Althea X Withshyannail it box
Althea X Withshyan nail it box
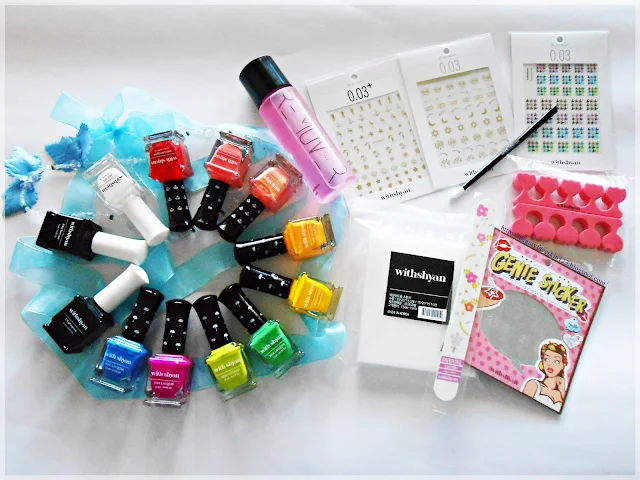
 Everything in Althea X WithShyan Nail It box
Althea X Withshyan nail it box
Withshyan nail remover
 No, it won't make your nail disappeared. It is just the Korean direct translation is nail remover. XD

Althea X Withshyan nail it box
Withshyan favourite nail art sticker

Althea X Withshyan nail it box
Withshyan sponge and ruby pusher

Althea X Withshyan nail it box
Withshyan genie sticker

Althea X Withshyan nail it box
Withshyan genie sticker

Althea X Withshyan nail it box
Withshyan paper file

Althea X Withshyan nail it box
Withshyan toe separators


Inside the box there are 21 nail products.  9 nail lacquer/nail polishes, filler base, UV gel nail top coat, nail polish remover, peel off, paper file, ruby pusher, paper nail file, nail art sponge, toe separators,1 genie sticker and 3 random favourite stickers.


List of Withshyan nail polish colours:
Honeymoon is a bright red color with fine black glitters.
Bouquet is a really pretty soft glittery pink. The most popular colour for bridal nails.
Spring golden bell is a bright yellow.
Mango is a bright light orange.
Reddish purple is a purple with pink undertone to it.
Geranium is a bright red colour with orange. 
Green Latte is a yellowish light green.
Green Leaf is a dark green.
Lapis Lazuli is a deep bright blue.


I really like  Withshyan Nail It Box since it allows me to do a lot of nail art and patterns.

Spring golden bell, Mango, Honeymoon, Reddish purple, Geranium, Bouquet, Green Latte, Green Leaf, Lapis Lazuli.  The nail polishes are really vibrant, smooth and dry fast.  The colours are just perfect for this summer given that pastel goes well with the this year fashion trends. Their nail products are of good quality and definitely worth the money.

What I really like from this box is the peel off which you can use to create a lot of patterns on the nail. This make it a lot easier to do nail art on the other hand using my non dominant hands. I think many of you can understand that it is really a struggle to just apply nail polish using our non dominant hand.

The top cot is really great to create the gel nail polish look. Apply it on top for the gel nail effect look which is really nice.

Overall, Withshyan Nail It Box is a great box to get and I love every products inside this box.  I will probably do more nail art design in the future.


Lastly, bonus picture.

Korean inspired negative space fruit nail art design


I did a nail tutorial for Korean summer fruit nail watermelon with products in the Withshyan so check out HERE.

 
Product retails for
Althea X With Shyan Nail It Box  at RM93 (original price at RM448)
Made in Korea.

RM20 off for your first order, and I'll get RM20 HERE
For more information, please visit Althea official website, Althea Instagram, Althea Facebook and With Shyan website.  Product is courtesy of Butterfly project . However, the opinions expressed here are my own and honest as always.

Follow me on my blog and social media sites:


Youtube //  Instagram // Twitter // Pinterest // Bloglovin' // Facebook

Monday, May 1, 2017

TUTORIAL ON THE LATEST 2017 KOREAN WIRE NAILS ART TREND

Hi beauties,

If you are into the shattered glass manicures, 2017 nail art trend is about the wire nail art and recently is the neon manicure by Eun Kyung Park who is the founder of Unistella Salon and inventor of the shattered glass manicures.

I do like the wire nail art trend and am just sharing with you an easy tutorial which you can actually DIY at home.  Before you run to the store or kitchen looking for unused wires do listen to me first.  I am not a manicurist at all so this is not going to look as nice as done at nail parlor by professional. 

I do not have the cure machine or those tools for nails. If you have all that, it makes thing way easier.  I use eyebrow tweezers and my fingers, so you get why my work look rough.

So here is the latest  2017 wire nail art trend tutorial.

wire nail art trend tutorial
wire nail art
2017 korean wire nail art trend tutorial
2017 Korean wire nail art trend
wire nail art trend tutorial
wire nail art trend 


Things needed: (really basic)
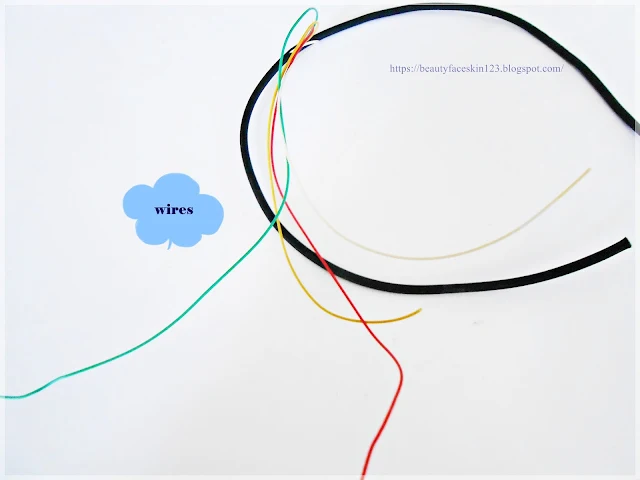
1. Wires (just recycle it from the stuff that you want to throw away. Some use stripping tape which is easier to work with)
2. Eyelash glue or glue for nails
3. Transparent nail polish
4. Cure machine (optional)
5. Tweezers (I use my eyebrow tweezers)


Wires
Wires
I used the wire from the computer mouse which I had thrown the mouse away long ago.

Wires
Wires 
 Instruction;
1. Just remove those bronze wire from their insulator. The one I use here is very thin and hard to work with.  If you have the cure machine then you can get a thicker one to work with.  The one that used is actually gold, silver and black but I only have bronze.  One I saw use stripping tape which is also easier to work with but I don't have it XD.

wire nail art trend tutorial
wire nail art trend tutorial-heart shape


2.  Then, bend the wire into the shape that you want.  Here is the heart shape which is easier to shape into. Just make a loop and pull the two side down and twist it.


wire nail art trend tutorial
2017 Korean wire nail art trend

2017 korean wire nail art trend tutorial
2017 Korean wire nail art trend

2017 Korean wire nail art trend tutorial
2017 Korean wire nail art trend

 These two are my most favourite design of all.

2017 korean wire nail art trend tutorial
2017 Korean wire nail art trend

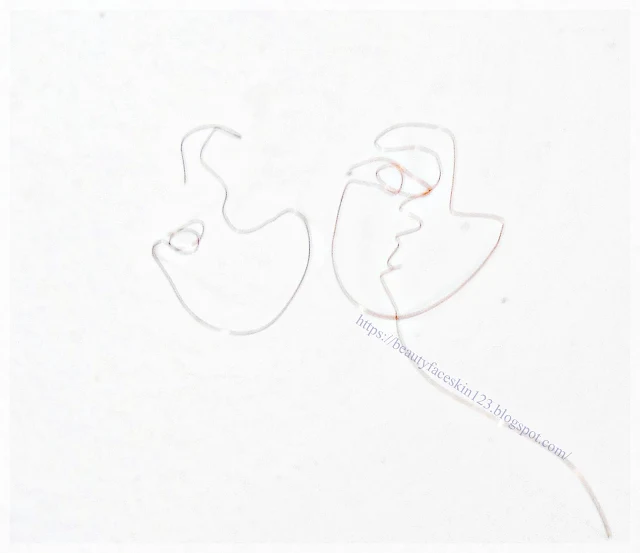
3. Here is some other shape that I did which is similar to Unistella design but in bronze.  You need to check out the size of your nail first before shaping it out. The cubism shape (Picasso) is the favourites and the most in trend.  The eyes, mouth and the heart shape looks weirdly nice.

2017 korean wire nail art trend tutorial
2017 Korean wire nail art trend

4. Then apply glue and stick the pattern onto your nails.  I don't have eye lashes glue so I just stick it with nail polish.  It is a bad idea and not a smart thing to do.

5. Done.
2017 korean wire nail art trend tutorial
2017 Korean wire nail art trend and diamond nail


So, here is my most beautiful and also ugly destroyed wire nails art trend.  XD
I am not sure if you can follow this. It is fun to recycle your wire from throwing them away and the feeling of satisfaction of looking at the Picasso art that you have probably wanting to do.

Honestly, to make things easier, get the ready made nail sticker or get someone else to do it for you.  It is way easier than trying to be Superly Sexy Wire bender to shape all that fragile wires into that eyes and mouth that you want.


*there is slight yellowish tint on my middle finger because I accidentally cut my finger the day before and having a band aid is not going to look nice.

Not sponsored.  However, the opinions expressed here are my own and honest as always.

Follow me on my blog and social media sites:


Youtube //  Instagram // Twitter // Pinterest // Bloglovin' // Facebook

Thursday, November 26, 2015

EASY SHATTERED GLASS NAIL ART TUTORIAL

Hi Beauties,

Shattered glass nail art is highly rave in Korea now.  Many find it really pretty and easy.
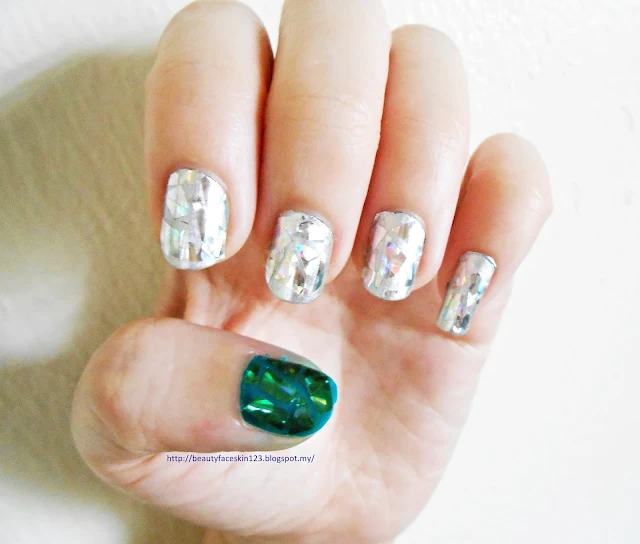
Here is my version of shattered glass nail art.  I am just using three things.  This is easily achieved and last for about 5 days.


EASY SHATTERED GLASS NAIL ART
SHATTERED GLASS NAIL ART


Is it pretty?

EASY SHATTERED GLASS NAIL ART
SHATTERED GLASS NAIL ART
I did silver and turquoise on the thumbs.


EASY SHATTERED GLASS NAIL ART
SHATTERED GLASS NAIL ART
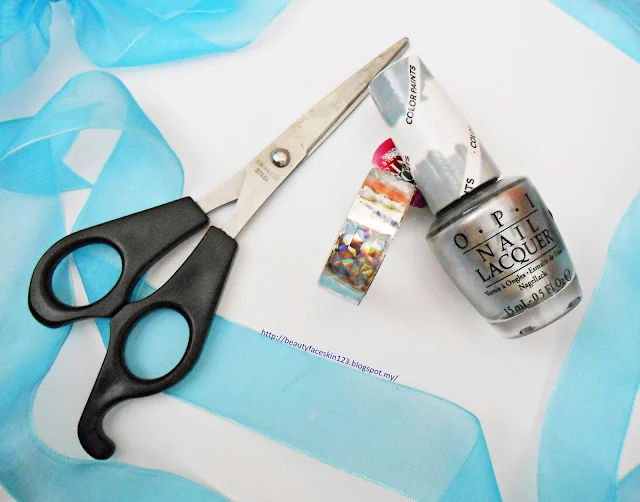
Here are the things that you need.

Scissors
Silver holographic Cellotapes
Silver nail polishes


You absolutely don't have to use the same brand of nail polish that I use. As for the silver holographic cellotapes, I get it from stationery shop that sells 10 rolls for RM2.25 (USD 0.50) .  It is way easier to use since they are already in form of stickers and I can use scissors to cut them up.
This is the easiest since I find that holographic papers doesn't last as long as the one in stickers.


EASY SHATTERED GLASS NAIL ART
SHATTERED GLASS NAIL ART
1. Paint your nails in silver or colour that you like.

EASY SHATTERED GLASS NAIL ART
SHATTERED GLASS NAIL ART
2.  Cut those stickers into shattered types -triangular will be better. Let those shattered sticker stick to your scissors.

EASY SHATTERED GLASS NAIL ART
SHATTERED GLASS NAIL ART
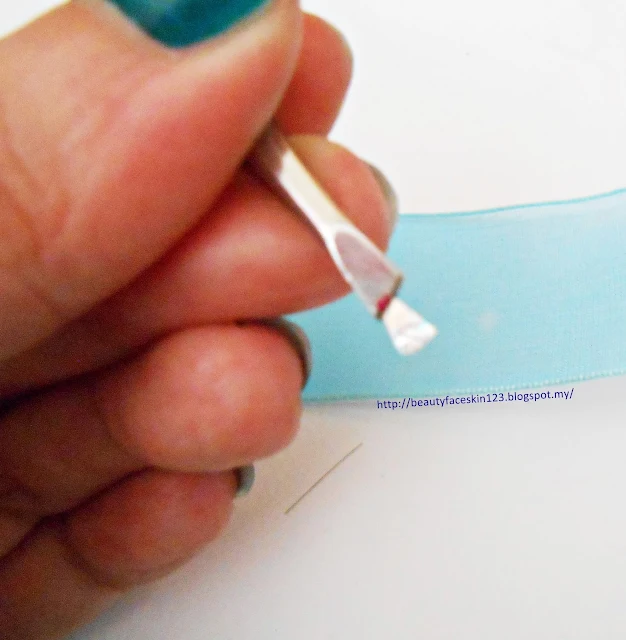
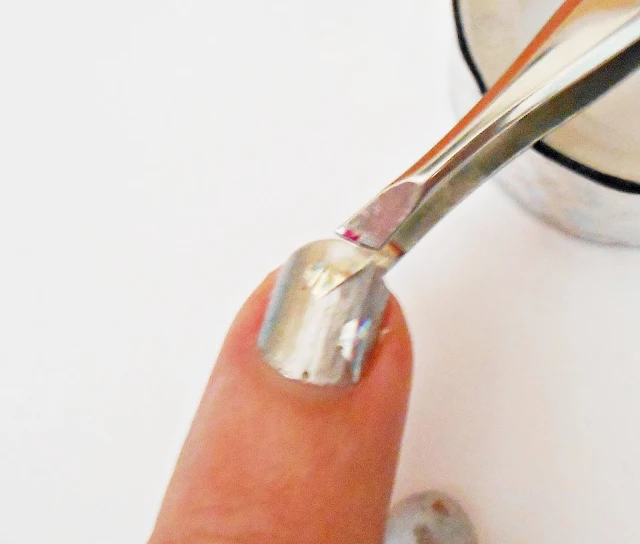
3.  Take those shattered glass from the scissors with a tweezer.  Place those shattered stickers on your nails.

EASY SHATTERED GLASS NAIL ART
SHATTERED GLASS NAIL ART
4. Tadaa, beautiful nails.  Put top coat on your nails for the sticker to last longer.

EASY SHATTERED GLASS NAIL ART
SHATTERED GLASS NAIL ART

So, what do you think of it?  Do you think it is easy to create?


Not a paid review.  However, the opinions expressed here are my own and honest as always.

Follow me on my blog and social media sites:

Have a great day =)